
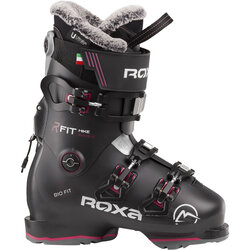
How to try-on and Evaluate the Size & Fit of Ski Boots
A Step-by-Step Guide
We have a pretty tried and true method at Gorham Bike & Ski for trying on ski boots to confirm size and ensure performance and comfort. In this article we’ll cover how to put on ski boots and how to try on ski boots to make sure they fit.
What Socks to Wear
One pair is enough! Trust us. Wearing multiple pairs of socks or socks that are too thick can create pressure points on the feet, reduce circulation and make your feet cold and go numb. More than one pair of socks or socks that are too thick also reduce the control you have over your skis. We suggest lightweight socks. If you want a little more cushion on the toes and heels, most sock companies offer lightweight socks with a little more material around the toes and at the heels.
We suggest socks made of Merino wool or a moisture wicking synthetic material. Socks made from these materials will take moisture being produced by your feet and transport it away from your ski keeping your feet warmer and your boots feeling more comfortable throughout the day.
Avoid cotton and rag wool socks. Cotton absorbs sweat and keeps it close to your skin rather than moving it away. This results in cold feet. Rag wool socks tend to be on the thicker side and don’t deal with moisture all the well either.
Pro Tip: Bring two pairs of socks to the mountain and change at lunch or snack time. Try it. You’ll thank us!
How to Put on Ski Boots
1. Unbuckle the boot completely. Undo all buckles, including the power strap, and make sure none of the buckles are catching. You may be able to rotate the buckles slightly to avoid them from catching. Make sure to remove any paper stuffed in the toe of the liner. Have a seat and sit with the boots in front of you.
2. Keep the boot flat on the ground and step into it as you stand up. Most boots have a loop on the tongue to help you pull it up and forward. Grab the tongue loop, point your toe straight into the boot, and in one deliberate motion pull the tongue up and out as you stand and step into the boot. With very stiff performance boots, it sometimes helps to grasp the medial (inside) cuff by the buckle straps with one hand and the tongue loop with the other and pull the two sides apart as you slide your foot in – this will spread the stiff plastic in the instep area and give you more room to slide your foot in.
3. Center the tongue on top of your foot. Make sure the tongue of the boot liner is centered, and check that it’s positioned inside the of the liner. Don’t make an assessment about the fit yet, as the boot isn’t buckled and your foot isn’t settled. Don’t be alarmed if your boot feels tight. In our stores, when we first put a properly sized boot on a customer's feet we often hear "These are too small". To that, we say, "Right answer". Don't freak out! Your toes might brush the end of the boot or even pressing to the front of the boot with moderate pressure. At this point, your foot hasn’t warmed up the liner foam or started to push excess air out. Also, your foot isn’t in the “ski position” yet, because you haven’t buckled the boot.
4. Buckle the top two buckles lightly. This will help to seat the tongue on the instep of the foot. Don't crank the buckles shut. You should be able to close the buckles with 1 or two fingers at this point. If you are having to use your palm and all you've got to close the buckels you are making them too tight.
5. Next, snug up the power strap. Flex the boot forward (hard). Flexing into the boot a few times with bottom buckles still unbuckled will help pull your toes away from the front of the boot and push your heel deep in the heel pocket.
6. Fasten all the buckles snug. Again, you don't want to be cranking the buckles so tight that you need to use all your might to close them. The pressure you can apply with just two fingers should be enough to get the boots as tight as you need them to be. Keep in mind that your boots, at this point, are the tightest they will ever be - they will loosen up as you and the boots warm up.
At this point you could go and ski. But let's evaluate the size of the boots at this point.
Evaluating Ski Boot Size
Once you have gotten the boots on your feet and buckled up using the steps outline above, it's time to evaluate the size of the boots.
1. Stand with your weight on your heels. Don't lean forward into cuff of the boot. With your weight back on your heels, your toes should be toughing the front of the inside of the boots with light to moderate pressure.
2. Lean forward into the cuff. Now flex forward at the ankles into the cuff of the boot. When you do, you should feel your feet getting pulled back toward the heel of the boot. And now your toes should also come back away from the front of the boots and you will have wiggle room. This is what will happen when you are skiing.
3. A good fit. A boot where your toes touch the front of the boot with light to moderate pressure when standing with your weight on your heels but where you have wiggle room for your toes when you flex forward into the cuff is considered a good size choice.


How to Do a Shell Fit
Once you have confirmed boot size using the "liner in" method above, you can take it one step further and check that the size of the actual shell of boot is the correct size for you. Follow the steps below to perform a shell fit.
1. Remove the liner from the shell. Start with the boot completely unbuckled and on the floor with the toe facing away from you while you sit or kneel behind it. With your dominant hand firmly grab the top of the liner. With your other hand grab the top of the shell with your fingers between the shell and the liner. With one swift motion push the liner forward and away from you. Bam!! The liner is now out of the boot.
2. Step into the shell. Wearing the same socks you would wear when skiing, slide your foot forward until your toes just touch the front of the boot.
3. Check the space between your heel and the back of the shell. Most skiers will want to be able to fit their index finger in this space. This translates to roughly a half of an inch or about 15 millimeters. This is considered an all-mountain fit and works well for most skiers. Very agressive skiers may go a little smaller where there is a quarter of an inch +/- between their heel and back of the shell. A shell fit that is larger than three quarters of an inch will normally prove to be too loose once the liner compresses from skiing.
Get comfortable
After determining that you’re in the right size shell, put the liner back into the shell and spend some time wearing the boots around. Standing in the boots and going through the motions of skiing for 10-20 minutes is a good way to start the process of making the liner foam conform to your foot, as well as acclimating your feet to the feel of the boots.
If you’re new to skiing, remember that no ski boot will feel as comfortable as your street shoes, but stick with it – your street shoes won’t cut it for sliding down the mountain!
You can fine tune the fit in a number of ways using adjustments that most buckle systems have - twisting the bale of most buckles clockwise will shorten the length and increase the tightness slightly, so you can achieve a tension in between notches on the buckle ladder (the notched metal plates the buckle bales fit in) of the buckle system.
If the cuff of the boot is too tight around your ankles or shins, most buckle ladders have two or three available positions where they can be attached to the boot shell. Some ladder tracks can be moved simply by twisting or unfastening a latch, others require a screwdriver or allen wrench.